Table of contents
Open Table of contents
Introduction
React native is open source framework created by facebook, which is used to develop mobile apps using javascript and react. In this article, we will learn how to start with react-native development on linux by installing all the necessary tools. At the end of the article you will have a bare bones “Hello world” react-native application running in your system.
I will primarily be using Arch Linux for this guide, but whenever necessary, I will also provide instructions for other popular Linux distributions such as Fedora and Ubuntu.
We will require these 4 tools for setting up developer environment for react-native.
- Node JS
- Java OpenJDK
- Android Studio
- Visual Studio Code
Installing and Setting up NodeJS
To manage Node.js versions, we’ll be using Node Version Manager (NVM), which is compatible with any Linux distribution. NVM offers the flexibility to install and switch between multiple Node.js versions on our system, enabling us to work with different projects that require specific versions of Node.js. You can learn more about nvm here.
Steps for installing and setting up NodeJs using nvm:
Open this link to download nvm. Where you will get the script to download and install nvm OR Just copy paste the below command in your terminal.
curl -o- https://raw.githubusercontent.com/nvm-sh/nvm/v0.39.3/install.sh | bashAfter downloading NVM, refresh your Bash session with the following command:
bashRun the following command to verify the nvm installation:
nvm --verionWe’re now ready to install Node.js using NVM, and we’ll be installing the Long-Term Support (LTS) version. To do so, execute the following command:
nvm install --ltsAgain refresh your Bash session with the following command:
bashVerify your node js download using the following command:
node -vInstalling and Setting up Java OpenJDK
To install java openJDK use the following command:
-
for arch and arch based linux distros.
sudo pacman -S jdk11-openjdkFor more info check Arch wiki.
-
for ubuntu and ubuntu based linux distros.
sudo apt install openjdk-11-jdkFor more info check help.ubuntu.com/community/Java.
-
for fedora and fedora based linux distros.
sudo dnf install java-11-openjdk.x86_64For more info check docs.fedoraproject.org.
Adding JAVA_HOME environment variable in bashrc.
To add the JAVA_HOME environment variable, edit the .bashrc file located in the home directory (which is a hidden file). Simply copy and paste the following content to add the JAVA_HOME variable in .bashrc.
-
for arch and arch based linux distros.
export JAVA_HOME=/usr/lib/jvm/java-11-openjdk/ -
for ubuntu and ubuntu based linux distros.
export JAVA_HOME=/usr/lib/jvm/java-11-openjdk-amd64 -
for fedora and fedora based linux distros.
export JAVA_HOME=/usr/lib/jvm/jre-11-openjdk
Installing and Setting up Visual Studio Code
I would recommend using VSCodium, which is functionally identical to VSCode but is a free and open-source alternative.
-
For Arch and Arch based linux distros
To install VSCodium we’ll use the following command to download it from the AUR (Arch User Repository) on Arch Linux:
yay -S vscodium-bin -
For Ubuntu and Ubuntu based linux distros use the following commands:
wget -qO - https://gitlab.com/paulcarroty/vscodium-deb-rpm-repo/raw/master/pub.gpg \
    | gpg --dearmor \
    | sudo dd of=/usr/share/keyrings/vscodium-archive-keyring.gpg
echo 'deb [ signed-by=/usr/share/keyrings/vscodium-archive-keyring.gpg ] https://download.vscodium.com/debs vscodium main' \ | sudo tee /etc/apt/sources.list.d/vscodium.listsudo apt update && sudo apt install codium -
For Fedora and Fedora based linux distros use the following commands:
sudo rpmkeys --import https://gitlab.com/paulcarroty/vscodium-deb-rpm-repo/-/raw/master/pub.gpgprintf "[gitlab.com_paulcarroty_vscodium_repo]\nname=download.vscodium.com\nbaseurl=https://download.vscodium.com/rpms/\nenabled=1\ngpgcheck=1\nrepo_gpgcheck=1\ngpgkey=https://gitlab.com/paulcarroty/vscodium-deb-rpm-repo/-/raw/master/pub.gpg\nmetadata_expire=1h" | sudo tee -a /etc/yum.repos.d/vscodium.reposudo dnf install codium
Installing and Setting up Android Studio
Install android-studio.
- Installing android-studio (on any linux distro)
-
Download the Android Studio tar file from the android studio official site, and then extract it using your preferred method.
-
Once extracted, go inside its bin folder and run the studio.sh.
./studio.sh
-
Installing android on arch and arch based distros.
For Arch Linux and its derivatives, an AUR package is also available which can be downloaded using the following command:
yay -S android-studio
Adding the necessary paths in bashrc for proper working of andoid-studio
To ensure the proper functioning of Android Studio, we need to add the necessary paths to the .bashrc file. Copy and paste the following content into your .bashrc file.
export ANDROID_HOME=$HOME/Android/Sdk
export PATH=$PATH:$ANDROID_HOME/emulator
export PATH=$PATH:$ANDROID_HOME/platform-tools
export PATH=$PATH:$ANDROID_HOME/tools
Adding android device for testing our react native application
For setting up Android device. There are two ways
-
Using physical device by connecting to computer using usb cable.
To test your React Native application on a physical device, connect your Android device to your PC using a USB cable. Ensure that USB debugging is enabled in your Android device’s developer options, and select file transfer mode for the USB connection.
-
Creating a virtual device in Android Studio. For a more detailed guide on creating virtual devices in Android Studio, you can refer to the official guide.
- Open Android Studio click on “More Action” then click “Virtual Device Manager”
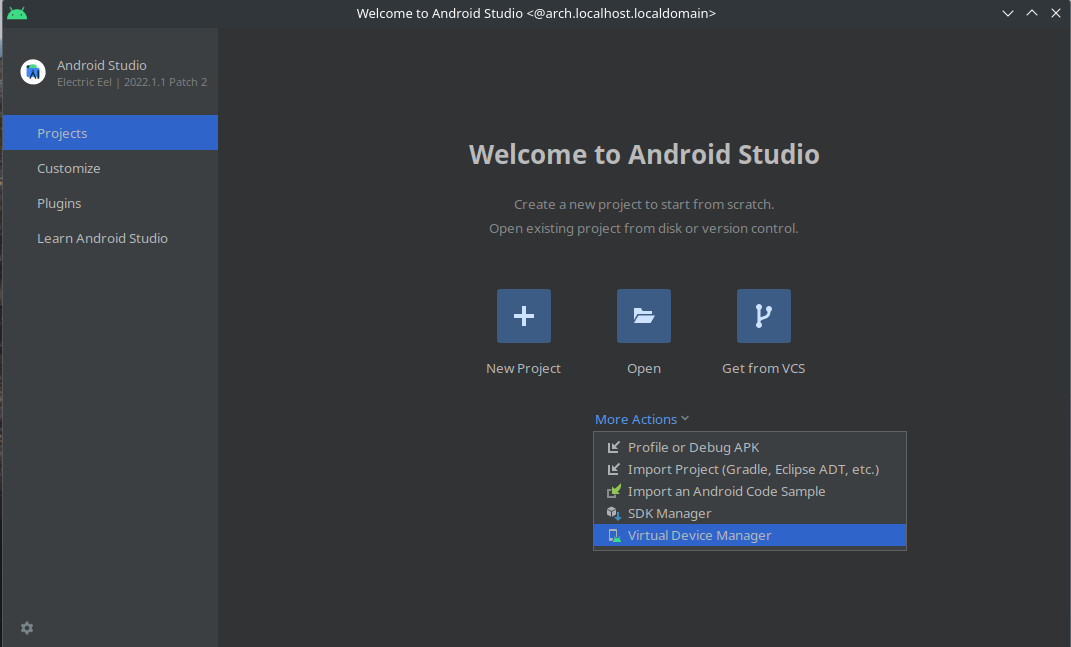
Fig. 1 - Virtual Device Manager in Android Studio
- Select a device which has Google play icon in Playstore column. From official documentation “A device definition labeled with the Google Play logo in the Play Store column includes both the Google Play Store app and access to Google Play services, including a Google Play tab in the Extended controls dialog that provides a convenient button for updating Google Play services on the device.”
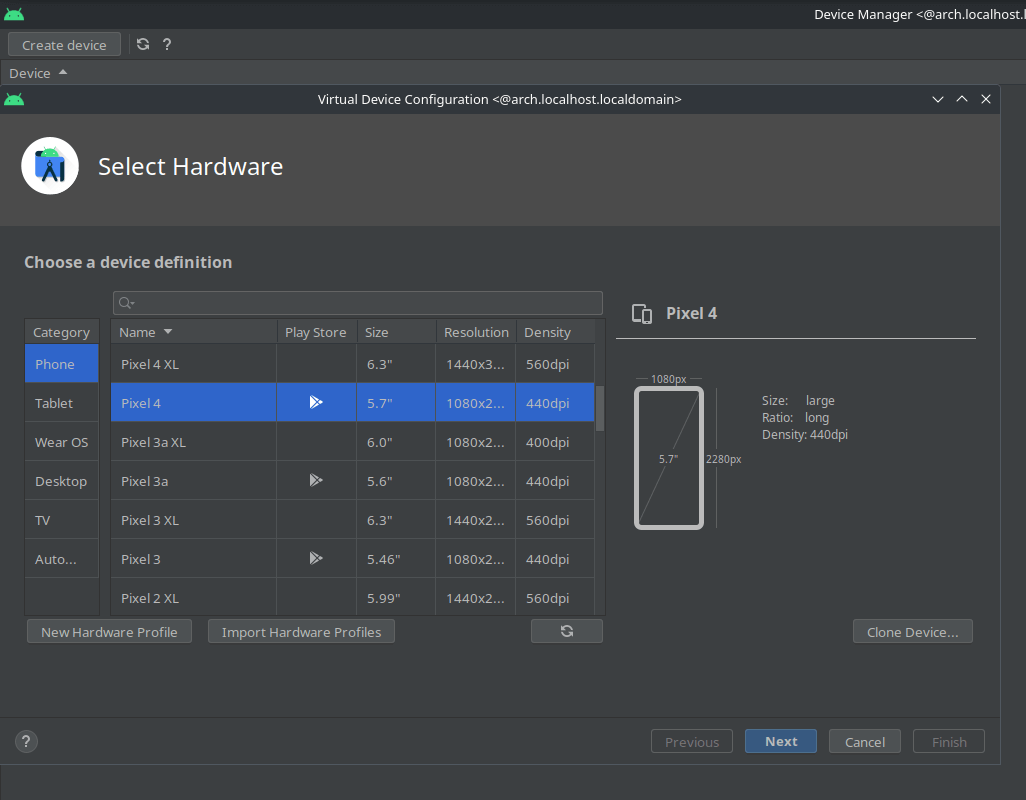
Fig. 2 - Selecting Android Virtual Device in Android Studio
- Click on the play icon to launch avd.

Fig. 3 - Virtual Device Launched
- If the emulator doesn’t launch or terminates instantly, you can launch it from the terminal to see the logs and diagnose any issues. In my case, the emulator failed to launch due to a missing libpulse library, which I resolved by downloading it.
- Navigate to your Android folder, which for me is located at ~/Android/Sdk, to start the emulator from the terminal
cd ~/Android/Sdk/emulator - Run this command to list the avds
./emulator -list-avds - Then run this command to start the avd
 ./emulator @<AVD_NAME>
 ./emulator @Pixel_4_API_33
- Open Android Studio click on “More Action” then click “Virtual Device Manager”
Starting with react-native.
To ensure everything is working, we will create a simple HelloWorld project in React Native.
Create a react-native project by executing the following command:
npx react-native init <ProjectName>npx react-native init Hello
cd HelloOpen the “Hello” folder in VSCodium/VSCode.
Open two separate terminals in the same folder and run these two commands.
npx react-native startnpm run androidYou will see the application running in your android device.
I recommend installing the “ES7+ React/Redux/React-Native snippets” extension by the publisher “dsznajder” in VSCodium/VSCode. This extension provides snippets that enable you to generate React Native components quickly and easily.
In VSCodium/VSCode, open the App.tsx file and delete its contents to start fresh. Type ‘rnfes’, and VSCode will automatically suggest the snippet from the extension we installed earlier. This snippet will create a simple component for us.
App.tsx
import { StyleSheet, Text, View } from "react-native";
import React from "react";

const App = () => {
  return (
    <View>
      <Text>Hello</Text>
    </View>
  );
};

export default App;

const styles = StyleSheet.create({});
Once you save the file, the application will display a simple ‘Hello’ message.
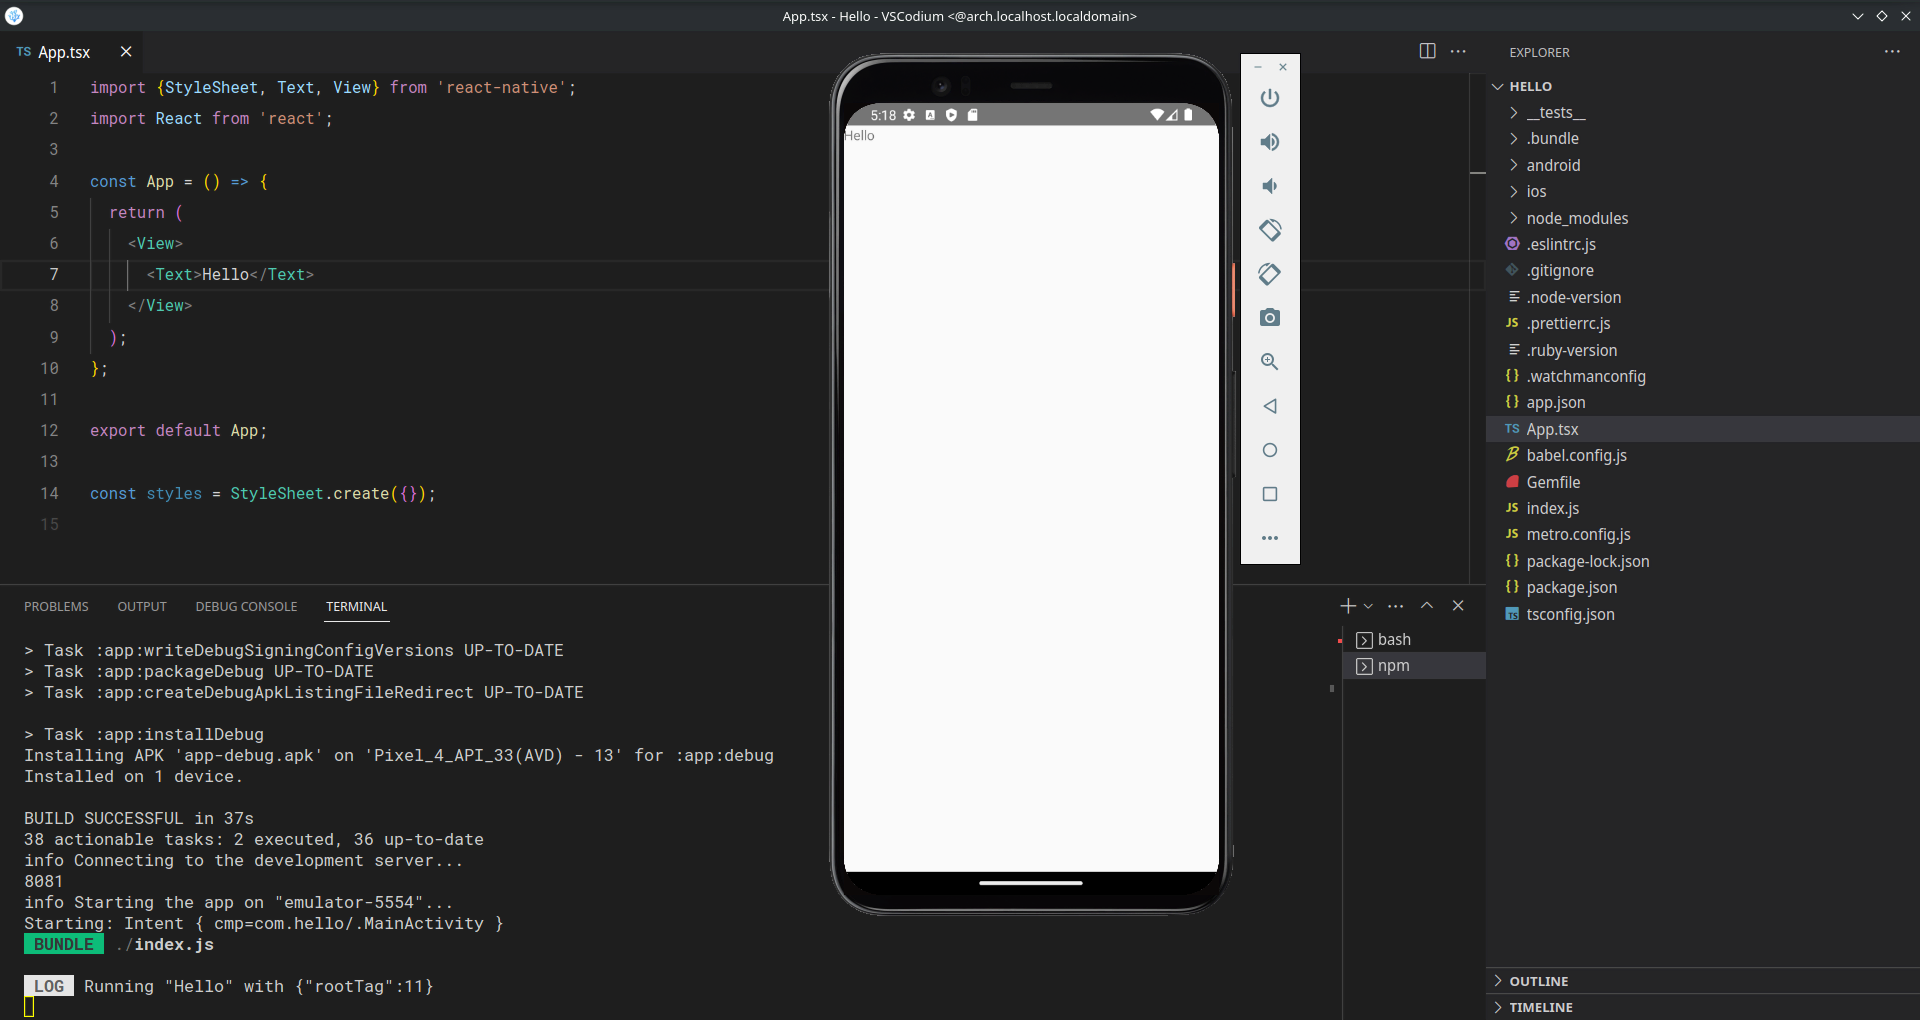
Fig. 4 - Application output showing `Hello` on screen.
Conclusion
Congratulations, you have successfully set up your development environment for React Native on Linux! By installing and configuring Node.js, Java OpenJDK, VSCodium, and Android Studio, you are now equipped with the necessary tools to develop high-quality mobile applications using React Native. With these tools in place, you can start exploring the vast potential of React Native and begin building amazing apps that will run seamlessly on Android platform. I hope this guide has been helpful, and I wish you all the best in your React Native development journey.
:)